Get started with Worre
Get Started
Section titled “Get Started”Download and install
Section titled “Download and install”On Windows 10 or 11 (x64), download the Windows installer. Run worre-setup.exe, follow the installer, then open Worre from the Start menu.
First run
Section titled “First run”Choose Try sample data in the setup window to explore the dashboard offline. Each row is an app or pipeline, and each column is an Azure DevOps Environment.
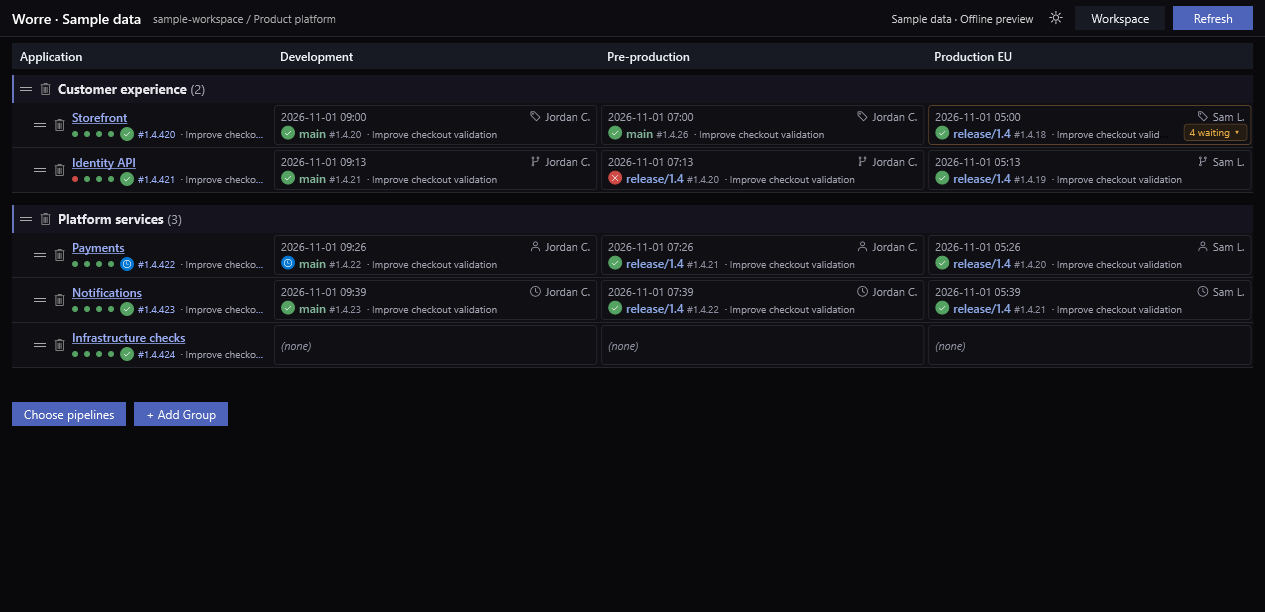
The Worre dashboard with sample data.
Connect one project
Section titled “Connect one project”- Sign in with your Microsoft Entra work account. If Microsoft asks for administrator approval, have your Entra admin review the prompt.
- Select your Azure DevOps Services organization and project. Pick one pipeline with a YAML deployment job and the Environments it targets.
- Finish setup and choose Open my dashboard. Compare a build shown in Worre with an existing deployment under Pipelines → Environments in Azure DevOps.
The grid shows recorded deployments. A newer run can still be waiting for approval while the previous build remains the latest recorded deployment.
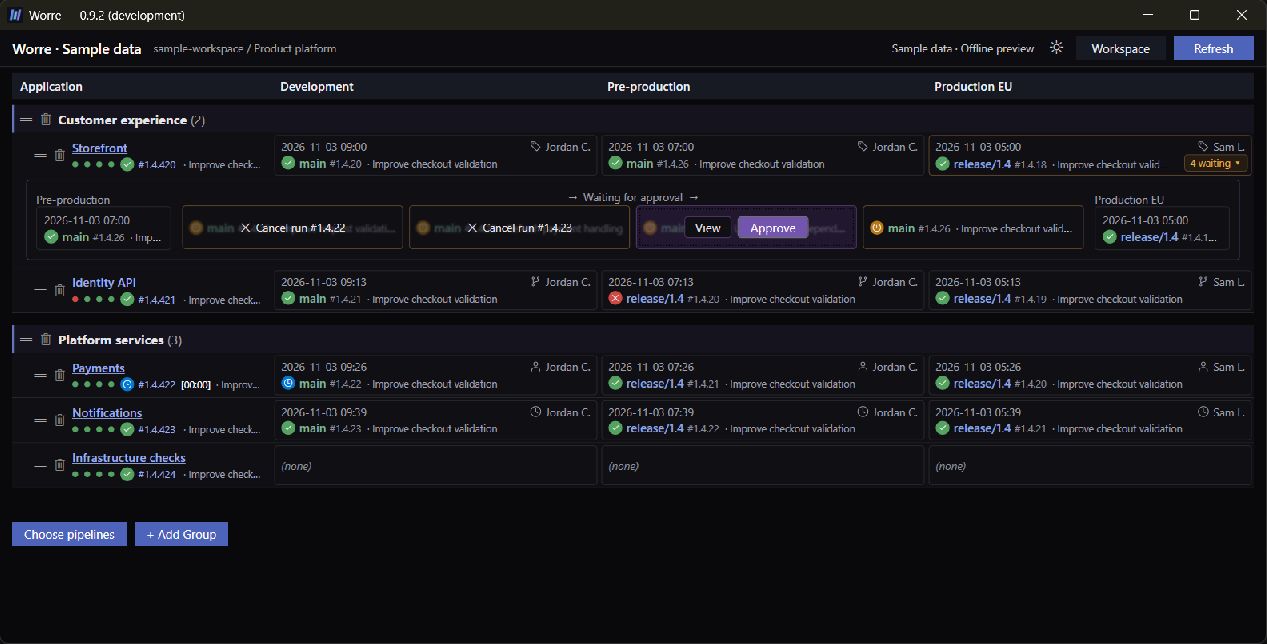
Check waiting runs separately from the deployment history.
Worre supports Azure DevOps Services with YAML jobs targeting Azure DevOps Environments. Classic releases and Azure DevOps Server are outside its current scope.